


How to remove drop ceiling tiles
Removing ceiling tiles for access or replacement
If you have a drop ceiling, chances are you’ll run across a situation that requires you to replace a few ceiling tiles or maybe even all of them. While there are many benefits to having a drop ceiling, one of the top reasons is to maintain plenum* access.
*Plenum: In suspended/drop ceiling construction, the space between the ceiling and the main structure is called the plenum. Within it is usually a combination of HVAC ducts, electrical conduits, water pipes, etc. See the below graphic ‘anatomy of a ceiling’ and visit Kanopi’s glossary for more ceiling terminology.

Whether you are gaining access, replacing a few ceiling tiles, or upgrading your look, follow Kanopi’s tips and considerations for minimal effort, mess, and breakage.
Planning and preparing to remove ceiling tiles
• Fix any issues. If you are replacing ceiling tiles due to leaks and stains, you must identify and repair the problem before installing new ceiling tiles.
• Find your replacement ceiling tiles. It’s easy to match and replace a few ceiling tiles or upgrade your look. Start with the tools and tips on Kanopi’s replacement ceiling tile page.
• Have new ceiling tiles ready. We recommend opening up the carton(s) and letting your tiles acclimate to the area for at least 24 hours before installing.
• Assess your grid. What size is it and will it work with your desired update? If your grid is over 30 years old or showing its age, it’s time to upgrade your grid. Armstrong’s standard grid widths are 9/16”, 15/16”, and 1-½” - though the most common are 9/16” and 15/16”. The type of grid system needed is dependent on what size and type of tiles will be used, as well as your desired look and any enhanced performance features you need from your grid such as, seismic, fire-rated, data center grids, and grids used for Clean Rooms.

Removing ceiling tiles
• Cover your work area. Ceiling tiles can be fragile and the process of removing them can stir up dust and dirt. Be sure to use tarps or drop cloths to cover your furniture and floors for easy clean-up.
• Set up your tools. Safety glasses, a mask, and a ladder are most important. If you need to cut your tiles to fit a border or around lights and vents, visit our how-to guides for a full tool list and additional instructions.
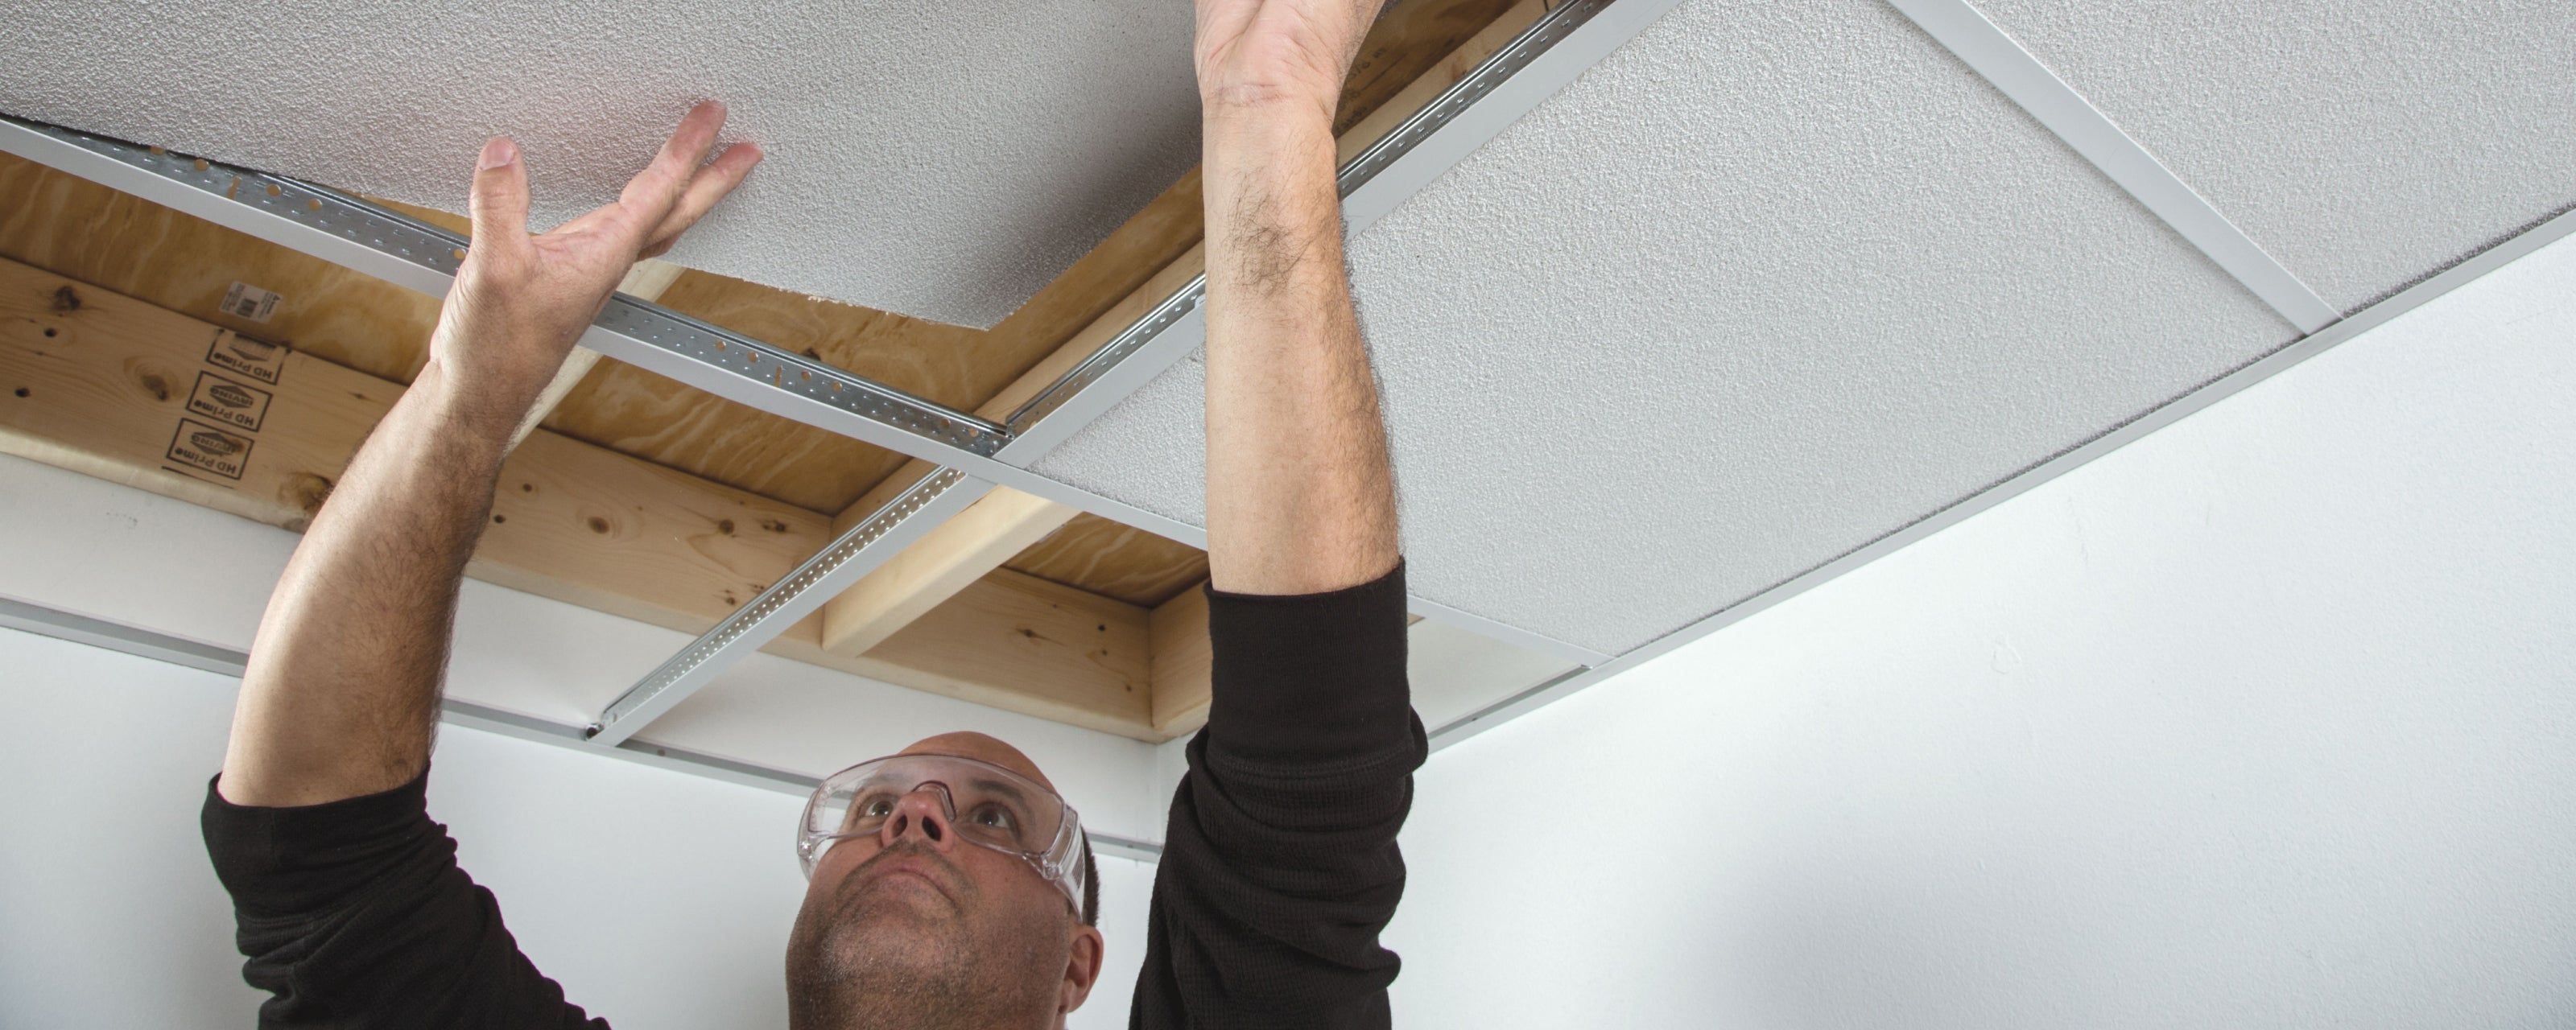
• Remove a ceiling tile. From a stable position on your ladder, reach up and gently push up on the tile with both hands. Angle the tile, clear your grid, and slowly pull the tilted tile towards you, removing it from the frame. Place it on your drop cloth.
• Disposing of ceiling tiles. Mineral fiber and fiberglass tiles can be recycled in designated areas. Check your product details and local disposal terms for the best way to dispose of your old ceiling tiles.
Maintaining your ceiling tiles
• Perform regular maintenance. With every Armstrong ceiling tile, there are specific cleaning and disinfecting guidelines. Each is based on many details, specific to your ceiling tile. Here are some general cleaning tips for keeping your ceiling tiles looking new.
Are you ready for your ceiling tile removal and replacement project? Whether you are making repairs, accessing the plenum, or replacing a few ceiling tiles, make sure to keep in touch with Kanopi for more tips, tricks, and ceiling tile how-tos.
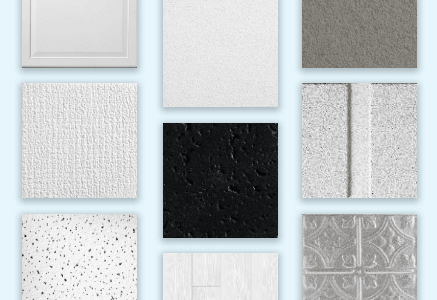
Popular ceiling replacement tiles
Find your replacement ceiling tile, shop now.

 Thanks for subscribing!

 Buy 3, get 1 free
